
Administrators can enable custom table classes in the Rich Text Editor
Using Custom Table Classes in the Rich Text Editor
👥 User Journey
📋 Setup
Setup
Select Pages from the side menu
Select a Task
Select a Page
Select the Content tab
In the header bar, click the expander arrow if the filter options are hidden
Select a Locale and Variant
Select a Component with Rich Text from the list on the right-hand side
📘 Steps
Create a table (skip if created)
1️⃣ Click the Insert Table button in the toolbar
2️⃣ Select the dimensions of the table
Apply custom classes to the table
1️⃣ To open the table’s editing menu, click on the table
2️⃣ Click Cell Style (shown below)
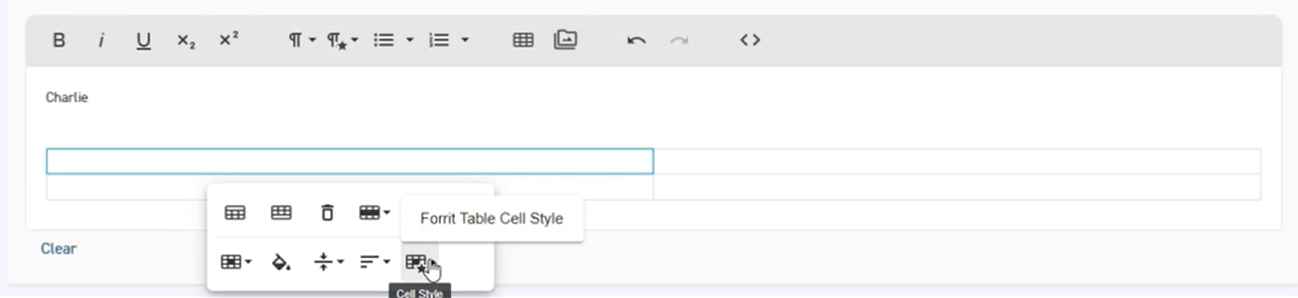
If you cannot see the above button, then your administrator needs to enable custom table classes
3️⃣ From the dropdown that appears, select a style to be applied to cells
4️⃣ Click Table Style (shown below)
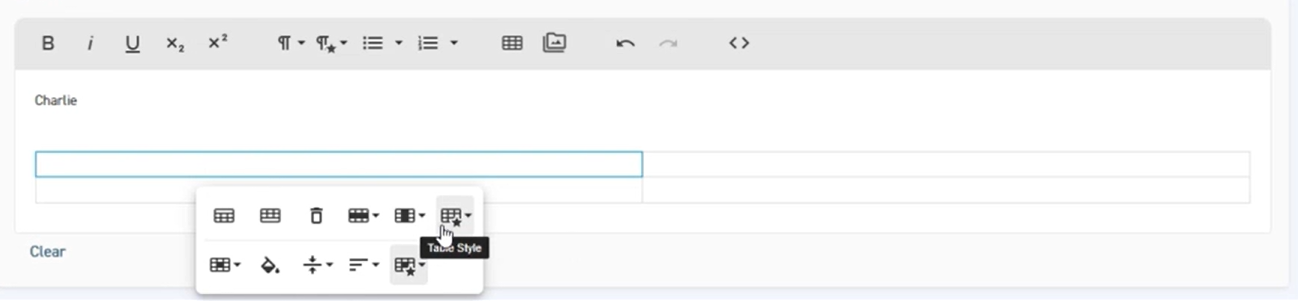
If you cannot see the above button, then your administrator needs to enable custom table classes
5️⃣ From the dropdown that appears, select a style to be applied to the table
View the applied classes
1️⃣ Click Code View to view the applied classes
🔖 References
-
Page Content Editor – learn how to use the Page Content Editor
-
Media Library – learn how to use the Media Library
-
Rich Text Editor configuration – administrators can enable and configure Rich Text Editor features